Inside the zone, your stop and your target are the same distance away
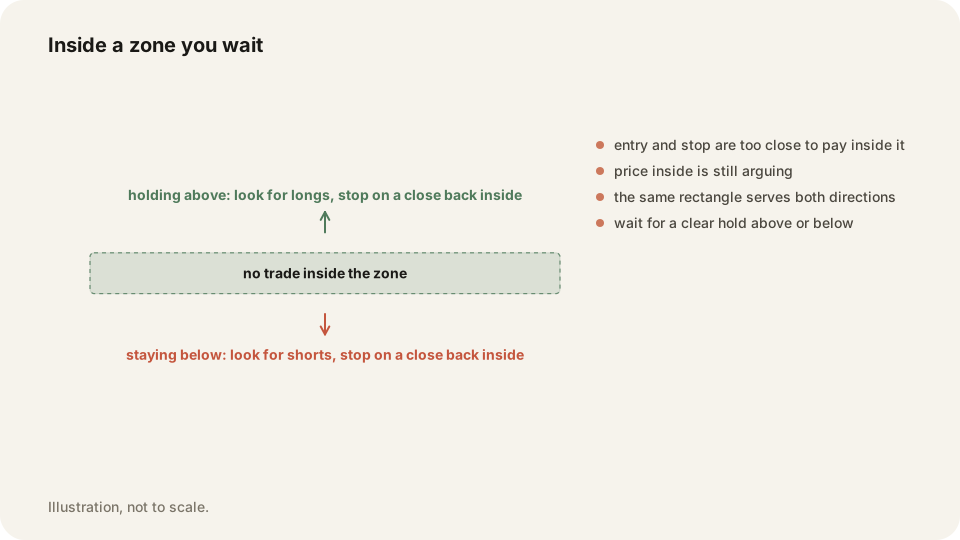
Price is sitting in the middle of the box and both directions look obvious. Run the numbers on either one and neither pays you. So the zone is where you set the alarm and wait.
The trade looks obvious from inside the zone and the arithmetic says no
Take a stock at 100.10 with a zone drawn from 99.70 to 100.40. You want to be long. The stop has to sit below the whole zone, call it 99.60, so you are risking 0.50.
Now price the reward. The first real obstacle above is the top edge of your own zone at 100.40. That is 0.30 of room against 0.50 of risk. The trade pays less than one to one before you have paid a single commission.
You can tighten the stop to 99.95 and get the risk down to 0.15. Then the ordinary chop inside the zone takes you out, because a zone is a place price argues with itself. Both the wick down and the wick up belong to that argument.
So the setup has no version that works. That is what a zone is telling you when price is inside it. Nothing has been decided yet, and you are being asked to guess which way the argument goes.
Only two states are tradeable: holding above the zone, or staying below it
Above and holding, the zone is support and you buy near it. Below and staying below, the zone is resistance and you sell rallies into it. Inside means no trade yet.
Holding has a definition, and it is the same one that governs your stops. Price has to close beyond the edge on the timeframe you trade. A wick through the edge is the market probing for orders, and it decides nothing.
Then you want a return. Price comes back to the edge it just cleared and refuses to close back inside. That refusal is the entry trigger. It puts you close to the level, where the reward geometry actually works.
Same chart, same rectangle, three completely different instructions depending on where price sits. Nothing about the drawing changes. Only your permission does.
The same rectangle is a sell level and a buy level
A resistance zone sells while price is underneath it. Once price closes above and holds, that identical box is where you buy pullbacks. The line did not change its mind. Price changed sides.
Support runs the same way in reverse. You buy near it while price holds above. Once price closes below and fails to reclaim it, the instruction flips. You are selling rallies into the box you were buying this morning.
This is why deleting a broken level is expensive. The broken level is usually the best entry available. It is a price the market already agreed to defend once.
It also means you never need a fresh idea when a level breaks. Flip the instruction, keep the rectangle, and wait for price to come back and prove the new side. If it never comes back, you sit out, which is a real outcome and not a failure.
Waiting has a price on short-dated options, so buy the time or stand aside
Sitting in a range on same-day expiry is the expensive way to be patient. Decay charges rent while price does nothing, and being right an hour late still loses. That combination turns a correct read into a red day.
With a day or more until expiry the same wait is affordable. So decide which one you bought before you place the alarm. A zone you expect to take two hours to resolve is not a zero-day trade.
The practical version: put an alert on both edges of the box and go do something else. You are waiting for a close beyond an edge, and staring at one-minute candles will only tempt you inside.
One honest limit. Nobody defines how wide a zone may get before it stops being useful. Nobody defines how flat sideways has to be either. Those stay judgment calls, and pretending otherwise would be a made-up number.
Run this before you click anything near a zone
Eleven checks, in order, on the timeframe you actually trade. Any single no and there is no trade.
- Mark the top and bottom edges of the zone before the open
- Check whether the last close was above, below or inside the box
- If it is inside, set alerts on both edges and stop looking
- Wait for a close beyond an edge on your trading timeframe
- Ignore wicks through the edge, including the painful ones
- Wait for price to come back toward the edge it cleared
- Enter only if price refuses to close back inside
- Put the stop on a close back inside, not on a touch
- Measure reward to the next marked level, not to a round number
- Skip the trade if that measurement pays less than two to one
- Check your expiry covers the time the wait will take
Frequently asked questions
You can, but the entry and the stop sit too close together to pay two to one. Wait for a close beyond an edge, then trade the retest of that edge.
A candle closes beyond the edge on the timeframe you trade, and price then fails to close back inside. A wick through the edge does not count.
Then you have a range, and range rules apply. Mark two touches on top and two underneath, wait for the break, and target the width of the box.
Let TraderLog price your middle-of-zone trades
Expectancy in TraderLog is the average dollars per trade, computed across your imported Schwab or IBKR fills. If middle-of-zone entries are dragging it down, that shows. The calendar and the stats page make that stretch easy to find.
Every trading morning at 8:40 ET our model draws the SPY, QQQ and IWM zones it expects to matter, on a TradingView chart, before the open. Where price reaches one, it has turned 74 percent of the time. Free, no account. See today's map